How to Maintain and Clean Your Die-casting Stand Mixer for Years of Reliable Use
Aug 19, 2025
You want your die-casting stand mixer to last a long time and work well. Simple habits like wiping the mixer after each use help your kitchen run better and keep your machine working. Many people think they can put die-cast attachments in the dishwasher, but this can hurt the coating and make them not last as long. Washing and drying by hand right away keeps your mixer safe and useful. If you clean every appliance carefully and use a cleaning checklist, your stand mixer will work well for you. A regular checklist helps your mixers stay in great shape.
Key Takeaways
Clean your stand mixer, bowl, and attachments after each use. This stops food from building up. It helps your mixer work well.
Wash attachments by hand with warm, soapy water. Dry them all the way to stop rust and damage. Check which parts can go in the dishwasher.
Wipe the outside of the mixer with a damp cloth. Use mild soap to keep its finish safe. This helps stop rust.
Deep clean your mixer often. Do this every month at home. Do it every week if you use it for work. This removes tough dirt and keeps it working well.
Check and tighten screws often. Lubricate moving parts to help them work. Clean places that are hard to reach. This keeps your mixer strong and smooth.
Daily Clean for Stand Mixer
After-Use Steps
You should clean your stand mixer every time you use it. This habit keeps your mixers working well and helps prevent problems. Start by unplugging the mixer. Remove all attachments and the bowl. Wash the bowl, whisk, beater, and dough hook with warm, soapy water. Dry each part before putting it back. Cleaning appliances right after use stops food from sticking and makes cleanup easier. If you see stubborn dough or batter, soak the bowl and attachments in warm water for a few minutes. Use a soft sponge to clean all surfaces. Avoid using rough pads that can scratch the bowl or mixer.
Tip: Wipe the mixer’s body and head with a damp microfiber cloth after every use. This step removes flour, dough, and splashes that can build up over time.
Attachments and Bowl
Attachments and the bowl need daily cleaning. Warm, soapy water works best for removing dough and batter. Dry each attachment and bowl completely before storing. This step prevents rust and mold. Many commercial stand mixers have large capacity bowls and commercial grade attachments. Some attachments are dishwasher safe, but hand washing helps them last longer. The Bosch Universal Plus stand mixer says most accessories are dishwasher safe, but not all. For example, the whisk is not dishwasher safe. You can check the table below for common attachments and their cleaning options:
Attachment
Dishwasher Safe?
Mixing Bowl
Yes
Mixing Paddle
Yes
Dough Hook
Yes
Splash Guard
Yes (top rack only)
Whisk
No
Clean the bowl and attachments every day. This habit keeps mixers free from grease and food residue. If you use commercial stand mixers, clean the bowl and attachments after each batch. Large capacity bowls need extra attention because dough can stick to the sides and bottom. Always check if your attachments are dishwasher safe before placing them in the machine.
Exterior Wipe
The outside of your stand mixer needs regular cleaning too. Use a damp cloth or microfiber towel to wipe the body and head. Mild dish soap mixed with water is safe for cleaning die-casting stand mixer exteriors. Avoid harsh soaps, bleach, ammonia, or industrial degreasers. These products can damage the finish and cause corrosion. Gentle scrubbing with a soft cloth keeps the mixer looking new. Rinse the cloth well to remove any soap before wiping the mixer again. Cleaning appliances with care helps them last longer.
Note: Always follow manufacturer-specific advice for how to clean a stand mixer. KitchenAid and other brands recommend gentle cleaning and regular checks. If you notice problems, seek professional repair options.
Clean the bowl, attachments, and mixer body every day. This routine keeps mixers in top shape and ready for your next recipe. Commercial stand mixers need extra care because they handle more dough and larger batches. Regular cleaning prevents buildup and keeps your stand mixer working for years.
Deep Clean and Maintenance
Deep Clean Routine
You should deep clean your stand mixer every month if you use it often for baking. If you use commercial stand mixers in a busy kitchen, clean them every week. Deep cleaning helps your mixer keep its power and performance. Start by unplugging the mixer. Remove all attachments and the bowl. Wash each part with warm, soapy water. Dry everything before you put it back.
Tough grime can build up on the mixer body and attachments. You can clean these spots with a gentle abrasive paste made from coarse salt and cooking oil. This mixture loosens grime without scratching the surface. For sticky grease, use a mild acid solution like white vinegar mixed with warm water. Add a little dish soap for extra cleaning power. Baking soda paste works well for tough carbon buildup. Mix baking soda with water and spread it on the dirty area. Let it sit for a few minutes, then wipe it clean.
Tip: Clean the surface when it feels warm. Warm metal softens old oils and grime, making them easier to remove.
If you see stubborn dough stuck to the bowl or attachments, soak them in warm water. Use a soft sponge to clean every part. Avoid steel wool, wire brushes, bleach, or strong commercial abrasives. These can scratch or damage the finish of your mixer.
Tilt-head designs make deep cleaning easier. You can lift the head to reach under and around the bowl. Clean the area where the bowl locks in place. Wipe the head and body with a damp cloth. Dry everything before you reassemble the mixer.
Hard-to-Reach Areas
Some parts of your stand mixer are hard to clean. You need to pay attention to nooks, crannies, and the attachment hub. Always unplug the mixer before you clean these areas. Remove all attachments and the bowl. Use a soft brush or toothbrush to clean small spaces. This helps remove food particles that hide in corners.
Follow these steps to clean hard-to-reach areas:
Unplug the mixer for safety.
Take off all attachments and the bowl.
Use a soft brush or toothbrush to clean nooks and crannies.
Wipe the mixer body with a moist cloth. Do not use harsh chemicals.
Dry all parts before you put them back.
Inspect attachments and moving parts for wear or damage.
Apply food-grade lubricant to moving parts if needed.
Check and tighten loose screws or fasteners.
Store the mixer with attachments removed.
Note: Clean these areas often to keep your mixer working well. If you use commercial stand mixers, clean hard-to-reach spots after every shift.
Gears and Grease
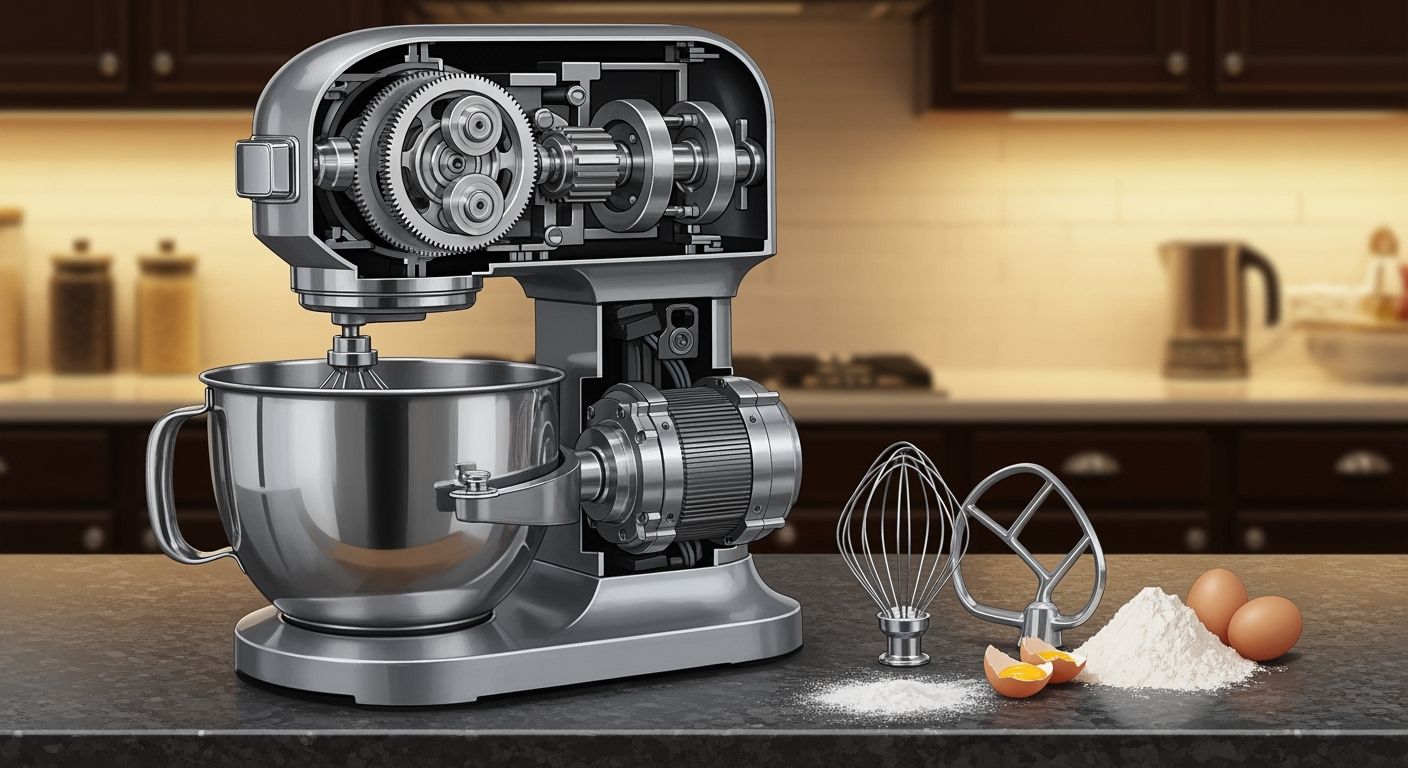
The motor and gears give your mixer its power. You need to clean and maintain these parts to keep your mixer running smoothly. Most mixers have sealed motors, but you should check for signs of grease leaks or strange noises. If you see grease around the motor or gears, clean it with a damp cloth. Do not use water near electrical parts.
If your mixer sounds louder than usual or loses power, check the gears. Some mixers let you open a small panel to inspect the gears. Use a stainless steel scraper with a sharp edge and wide blade to remove grime without damaging the finish. If you see old grease, wipe it away and apply fresh food-grade lubricant. This keeps the motor and gears working well.
Alert: Never use bleach, steel wool, or strong commercial abrasives on gears or motor parts. These can damage the metal and reduce performance.
Clean the motor vents with a soft brush. Dust can block airflow and make the motor overheat. If you use your mixer for heavy dough or baking, clean the vents more often. Always keep the motor dry and free from grease.
Regular deep cleaning and maintenance help your stand mixer keep its power and performance. Clean every part carefully, and your mixer will last for years.
Longevity Tips for Mixers
Lubricate Parts
You want your die-casting stand mixer to work well for years. Lubricating moving parts is very important. The heavy duty motor and bearings work hard each time you mix. Friction can wear them down and make them less strong. Lubricate the bearings every 400 hours with food-safe synthetic grease like Mobil SHC 634. This helps the motor run smoothly and stops it from getting too hot. If your mixer gets louder or changes speed, check the lubrication. A mixer with enough grease keeps the powerful motor working well and lets you use different speeds for recipes.
Tip: Put food-grade silicone lubricant on seals if you will store the mixer for a long time. This keeps the motor safe and the seals soft.
Tighten Screws
Loose screws can lower the power and flexibility of your stand mixer. The heavy duty motor shakes the mixer and can loosen screws. Check all screws and fasteners every month. Use a screwdriver to tighten any loose ones. Look closely at the attachment hub and base. Tight screws help mixing stay steady and stop extra strain on the motor. Checking screws often also keeps your mixer strong and safe.
Note: If you hear rattling or see parts move while mixing, stop and check the screws right away.
Proper Storage
Storing your stand mixer the right way helps it last longer and keeps the motor healthy. Always dry the bowl and attachments before putting them away. Do not store the mixer with the blade assembly still attached. This stops stress on the motor and keeps the heavy duty motor ready for next time. Store your mixer in a dry, safe spot away from water and dust. If you use it a lot, keep it on a strong countertop so you do not have to move it much. For long-term storage, add a little food-grade lubricant to the seals and cover the mixer to keep out dust.
Warranty coverage depends on cleaning and taking care of your mixer. Using harsh chemicals or skipping care steps can cancel your warranty. Always follow the manufacturer’s instructions to keep your mixer’s warranty good.
A regular maintenance plan helps you get the most from your mixer’s power, speed, and flexibility. Clean after each use, check the motor and attachments, and store your mixer carefully. These habits protect the heavy duty motor and help your stand mixer work well for years.
What to Avoid with Your Stand Mixer
Cleaning Mistakes
You want your die-casting stand mixer to last for years. Many people make mistakes when they clean their mixer. These mistakes can cause damage and shorten the life of your machine.Here are some common cleaning mistakes you should avoid:
You might skip regular clean routines. If you do not clean your mixer after each use, food residue can build up. This buildup can cause corrosion and mechanical wear.
You may use harsh chemicals or the wrong cleaning agents. These can corrode parts and damage seals. Always clean with mild dish soap and water.
If you do not dry all parts after you clean them, rust and mildew can form. Make sure you dry every part before you put it away.
Some people forget to clean hard-to-reach areas. Food particles can hide in small spaces and cause problems later.
You might forget to clean and lubricate moving parts. This can increase friction and wear.
If you do not secure attachments properly after you clean them, they can wobble and get damaged.
Overloading the mixer without a clean bowl or attachments can strain the motor and cause early wear.
Ignoring the manufacturer's guidelines on how to clean your mixer can lead to damage and void your warranty.
Tip: Always clean your mixer right after use. This habit keeps your machine in top shape and makes cleaning easier.
Damaging Products
Some products and methods can harm your stand mixer. You need to know what to avoid when you clean:
Never use bleach, ammonia, or strong commercial cleaners to clean your mixer. These can corrode the finish and damage seals.
Do not use steel wool or rough pads to clean any part of your mixer. These can scratch the surface and make it harder to clean in the future.
If you use cleaning products not recommended by the manufacturer, you risk damaging your mixer and losing your warranty.
Skipping regular inspections and clean routines lets hidden wear and damage get worse.
Poor training or not knowing how to clean your mixer can lead to mistakes that shorten its life.
Not following the right clean frequency or method can cause mechanical failures and hygiene problems.
Alert: Always check your user manual for the best way to clean your stand mixer. Using the right products and methods helps your mixer last longer.
Troubleshooting Your Die-casting Stand Mixer
Repair Signs
You want your stand mixer to work smoothly every time. Sometimes, you may notice problems that signal something is wrong. Watch for these common signs:
The mixer makes grinding or squeaking noises. This often means the gears or transmission have worn out. The motor may struggle to turn the attachments.
The mixer stops spinning or works only sometimes. Worn motor brushes or a failing motor can cause this problem.
You see the mixer change speed without warning. Faulty wiring or a bad control board can make the speed jump or drop.
The bowl lift or attachment does not fit right. Misaligned or worn parts can cause this issue.
The mixer will not turn on, or it loses power during use. Electrical faults, blown fuses, or a damaged power cord can stop the motor from working.
Tip: If you hear new noises or feel the mixer vibrate more than usual, check the motor and gears right away. Early action can prevent bigger problems.
When to Call Support
Some problems need a professional to fix. You should call customer service or a repair expert if you notice these signs:
The mixer does not spin at all. This often points to gear or transmission trouble inside the motor.
The mixer will not turn on. Electrical faults or a blown fuse may stop the motor from starting.
You see oil leaking from the mixer. This means the motor or gears need new lubricant.
The mixer changes speed on its own. Speed control or wiring problems can cause this.
You hear loud grinding or squeaking. Worn gears inside the motor may need replacement.
You see sparks or smell burning. This is a serious motor or electrical problem.
Alert: Do not try to fix major motor or electrical issues yourself. Professionals have the right tools and parts to repair your mixer safely. Trying to fix these problems at home can make things worse or void your warranty.
If you notice any of these signs, stop using the mixer and call for help. Regular checks and quick action keep your stand mixer safe and strong for years.
You can keep your die-casting stand mixer in top shape by following a simple clean routine.
Clean the bowl, attachments, and mixer body after every use.
Handwash parts in warm, soapy water and dry them well.
Wipe the die-cast body with a damp cloth to protect durability.
Clean hard-to-reach spots often.
Regular clean habits help mixers last up to 30 years, keep them stable, and improve performance.When you clean your mixers the right way, you protect your investment and enjoy better results every time.
FAQ
How often should you deep clean your die-casting stand mixer?
You should deep clean your stand mixer once a month if you use it often. If you bake every day, clean it every week. Use a cleaning checklist to make sure you do not miss any parts.
Can you put all attachments in the dishwasher?
Not all attachments are dishwasher safe. Always check your user manual before washing. Hand washing helps attachments last longer. Use a checklist to remember which parts need special care.
What should you do if your mixer makes strange noises?
Stop using the mixer right away. Check for loose screws or worn parts. If the noise continues, call customer support. A cleaning checklist can help you spot problems early.
Why is it important to dry all parts after cleaning?
Drying all parts prevents rust and mold. Water left on metal can cause damage. Always dry the bowl, attachments, and mixer body before storing. Add this step to your cleaning checklist.